 |
| A previous Suger Coat It header with image from We Heart Life {Credit linked in sidebar while in use} |
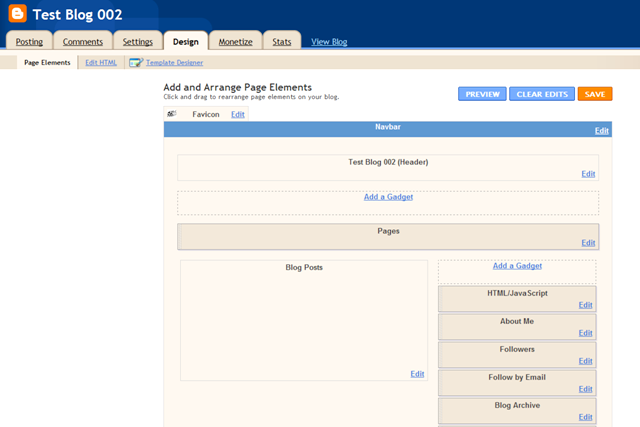 |
| image 1 – design panel |
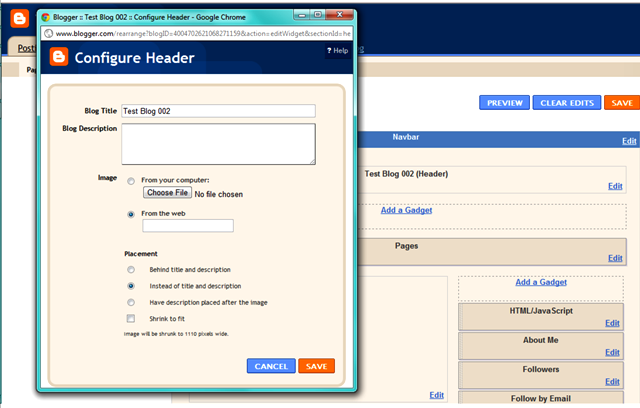 |
| image 2 – the pop up window |
7. Right down the bottom of the pop up window there is a shrink to fit line. This will say shrink to fit 1000px {or whatever it says} wide. This will tell you how wide your header will end up being.
8. At this stage check the image properties of YOUR saved header file to see how wide it is. If it is two or three times bigger {a LOT bigger} open it in your photo editing software and resize it. I’ve found sometimes the simplest way to do this is using picnic.com as it keep the images and text really crisp. If it doesn’t, reszie the image only and recrop, readd your text. Trust me, it will be worth the effort.
9. Head back to the header pop up window {reopen if you shut it}. Select the options instead of title and description and tick the shrink to fit box {unless you have resized to EXACTLY this width, you clever thing, then leave it unticked}. It will upload the image which will be visible when it is done.
10. Click save and the pop up window will close.
11. Above your design panel {image one} there will now be orange writing that says ‘Your changes have been saved. View blog’ click the view blog link to see the header live on the site. Congrats you are DONE!
Other tips
- Do your changes at a low traffic time of your blog. That way if you have to make the changes a few times, it won’t be popping around on the page while the majority of readers are trying to read it.
- Use the best software you are comfortable using. The higher the quality the better. But watch out that the file size doesn’t get too big. It will take ages to load and people won’t bother. Keep them {well} below 400kb if possible.
- Only use YOUR images or images that you are willing to credit {predominately} on your blog. If using an image that you can trace back to an original source, it is worth emailing them, asking for permission to use the image in your header with appropriate links.
Trouble shooting;
- If the header or text in the header appear blurry – The resize is too big. Upload your pic to picnik.com and resized to the exact px width it says in the header window.
- If your header hangs off the side of the page – You didn’t tick the shrink to fit. Go back, remove the image and tick this box BEFORE you upload the image.
- If the header takes up too much space DOWN the page – The rectangle of your header is too wide, continue to crop it back until it is the width you are looking for.
- If all fails, remove the image in the pop up window and save. All will return to normal.
- Comment below, I get notified of all emails, so I will respond via email or edit the post if it is a common issue.
Righto! Go on, get out there and crash your blogs!! HA. Jokes. Using this simple method it is virtually impossible to crash your blog. You could make it ugly for a bit. But nothing permanent. Promise.

Leave a reply to Melissa *Suger Coat It* Cancel reply